
What happens to the original files?
SharePoint Migration Manager
generates copies of the files and transfers these duplicates to Microsoft 365
for business. The original files will remain intact within Google Workspace.
What can be migrated?
- Files from Google Drive and Google Shared Drives
- Migration supports files with sizes up to 15 GB
- Docs, Slides, and Sheets
Notice when migrating the later
file types from Google Workspace, the Migration Manager converts them from
Google formats to Microsoft Office formats. For instance, ".gsheet"
is transformed into ".xlsx," similarly ".gdoc" becomes
".docx," and ".gslide" is changed to ".pptx."
This conversion is necessary because Google's proprietary file formats are not
compatible with Microsoft 365.
What cannot be migrated?
- Drawings
- Forms
- Sites
- Maps
- File shortcuts
What are the pre-requisites?
- Google Workspace super admin account
- Microsoft 365 global admin account
- User accounts in Microsoft 365
Notice that all users should have been
signed in before to Microsoft 365 for Business and set up their OneDrive for Business.
Migration
I will now walk you through the migration process. The
migration is a 3-step process which is explained in the article.
To start the migration, follow the 3-step process –
Step 1 - Connecting SharePoint migration manager to Google Workspace.
Step 2 - Selecting the users for bulk migration.
Step 3 - Start the migration process.
Let’s see these steps in detail.
Step 1 - Connecting SharePoint migration manager to Google Workspace
Log in to https://portal.office.com using admin credentials.
Admin credentials are needed to login to Microsoft 365 admin portal and later
on move to SharePoint admin portal.

Login to office portal
Click on Admin. This will open the Microsoft 365 admin center.
Click on Admin

In Microsoft 365 admin center click on the menu icon
and then click on show all. This will show the SharePoint option.

Click on Show all
Click on SharePoint. This will open SharePoint admin
center.

Click on SharePoint
In SharePoint admin center click on Migration.
Now the Migration tool is directly integrated in the
SharePoint admin portal. All type of migration from other platform to
SharePoint portal can be done using the SharePoint migration tool.

Click on Migration
Under migration, search for Google Workspace and click on Get
started. This will start the process of installation of Microsoft 365
migration app to the Google workspace account or in other words connect the
Google workspace account with SharePoint which will copy the data from Google
workspace to Microsoft 365 -

Click on get started
To install the app, click on Connect to Google Workspace.

Connect to Google Workspace
Click on Install and authorize, by this we are
installing and authorizing migration app to Google workspace so, that we can
read users details from there or in simple terms this process will integrate
google workspace with SharePoint manager which will later provide a SharePoint
administrator to fetch user details from Google Workspace.
This will open a new tab for Google workspace marketplace we
would revisit this page again so, don’t close this tab.

Click on Install and authorize
To install the SharePoint migration app on Google Workspace
we first need to login to the workspace using an admin credentials and then
install the app.
In Google Workspace Marketplace click on Sign in.

Click on sign.in
Enter your Google workspace admin credentials -
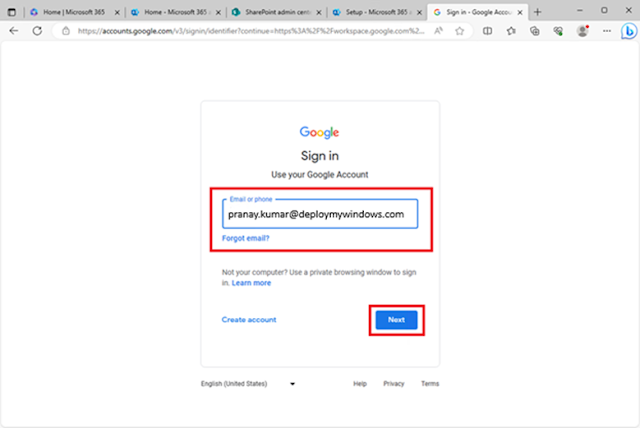
Enter workspace id
Enter the password and click on next.

Enter password
Click on Admin Install. This will start the
installation process for SharePoint migration app.

Click on Admin Install
Click on Continue to proceed with the installation.

Click on continue
Check if, “Install the app automatically for the following
users” option is set to “Everyone at your organization” This option let the app
to be installed for all user account and will help in the case of bulk
migration. Select the “I agree…” checkbox and click on Finish.

Accept EULA and click on Finish
When the installation completes, select Done. This
will complete the installation process.

Click on DONE
After this the app should be installed successfully in the tenant.

App installed successfully
Once the installation is done we need to go back to “Install
the migration app” site and continue with the installation process.
Return to the Install the migration app page and click on Next.

Click on Next
Click on Sign in to
Google Workspace, now we have to use Google Workspace admin credential to
signin here -

Sign-in to Google Workspace
Enter your Google Workspace admin credentials.

Enter Google workspace account
After the admin account credentials are provided, the google
workspace tenant will be successfully connected to the SharePoint tenant using
the migration app installed in Google workspace tenant.
Click on Finish to complete the integration process.

Google Workspace connected successfully
Step 2 - Selecting the users for bulk migration
In Google Drive Migration page, Click on Drives.
What are Drives?
Each user is assigned a drive where their data is stored. We
initiate drive migrations by selecting the users for the migration process.
We will first need to scan or discover all the Drives.

Click on Drives
Click on Add Drives. By this process all the new
drives will be discovered and will be available for migration.

Drives need to be added
Select all new Drives and click on Add. This
will make all new user drives available for migration.

Add all drives
After this all the user drives should show up.

All User drives listed
Next, we will select the Google drive that we want to migrate and scan them. Select the drives you want to copy and then click on Scan to ensure that their files can be migrated to Microsoft 365.

Step 3 - Start the migration process
Once the scan status of the drives shows as ready to migrate,
select the drives and click on Copy to Drive migrations -

Start drive migration
Click on Copy to Migrations.

Start the migration process
Once it’s completed, click on Go to Drive Migrations.

Go to Drive migrations
In Google Drive migration click on Drive migration, check the drive details. In the below screenshot you can see that the destination location for the drive is showing as none found. So, lets add the destination location first.

Check drive destination location
Notice that the Destination location
can be auto matched.
Let’s understand first what “Destination Location” is?
Destination Location is the location where you want to
migrate the user data. An account cannot be migrated without a destination
indicated and the destination path needs to be provided before starting the
migration. Once you start migrating content to a destination, it cannot be
modified.
If the destination location is not auto matched, there are
two ways of providing the destination location for the user accounts -
1.
For Multiple
users - Multiple user destination locations can be provided via a CSV file.
2.
For Individual
user – Individual user destination location can be updated from the portal.
Let’s see the process for this.
Update destination location for multiple user accounts (bulk migration)
If you have many destinations to edit or multiple accounts
to migrate, you can choose to upload a bulk destinations CSV file. Download the
MigrationDestinations.csv file template to your computer and enter your
destinations. Save your file as a .csv file using any name you wish.

Provide destination location using a CSV file
Notice MigrationDestination (.csv) is a template file
provided by Microsoft where the destination location needs to be updated. Administrator
needs to first download this file, then update the destination path in the file
and then upload it again in the portal.
Click on MigrationDestination (.CSV) to download the
CSV file and to add Destination location details.

Download Migration Destination CSV file
Add the destination
location details
in the CSV file.
Note - Review your destination CSV file before you upload it to make sure you have entered the values in correctly. The destination file is not validated, and once you have migrated to these destinations it cannot be undone.

Update Destination Path in the CSV file.
Upload the CSV file and click on save.

Upload Migration Destination CSV file
Update Destination location for single user account
To change the destination path for an individual user,
select the user name -
Change destination path of individual user
Click on Edit in the Destination.

Edit the destination
Select OneDrive as destination, provide user account name and click on save path.

Select OneDrive as destination path
Once done the destination path should appear now -

Destination location set now
Select the account which needs to be migrated.

Select user for migration
Click on Migrate, to start the migration process -
 |
| Click on migrate to start migration |
Click on Migrate.

Click Migrate to begin migration
Migration status can be checked from the Migration status
tab or by referring to details of the drives -

Migration is in progress
Once the migration is complete, Migration status should be shown as Completed.

When migration is completed successfully you can view the
total number of files and the amount of data migrated -

Migration completed successfully
You can click on Map identities if you want to configure how
to preserve permissions to the files -
Map identities for file permission
Result
The below screenshot shows the files that User 4 has in
Google Drive.

User files in Google Drive
After the migration same file has been copied to OneDrive.

User files in OneDrive after migration
Reporting
After the migration is complete, a detailed report can be
downloaded. Select the users and click on Download reports and then click
on Detailed to download the report.

Click on Recent actions at the top of the page to download
the report -

Click on recent actions
Click on Detailed-report.zip to download.

Click on Detailed-report zip file
Once downloaded, extract the zip file.

A CSV file named TransactionItem.csv should be
present -

Open the csv file to get the details of migration items -

Detailed report
Conclusion
As you have seen, the migration user drives from Google Drive to One Drive with Microsoft Migration Manager is a very longwinded process. Good luck!
No comments:
Post a Comment